Creating A Virtual Instrument
Note: The following guide is for ESX24 Sample – we hope to have a similar guide for Kontakt soon
The most exciting bit of this process is trying out your carefully recorded samples in a virtual instrument. The following shows how to load up your samples in Logic’s EXS24 sampler, however similar techniques can be applied in other samplers.
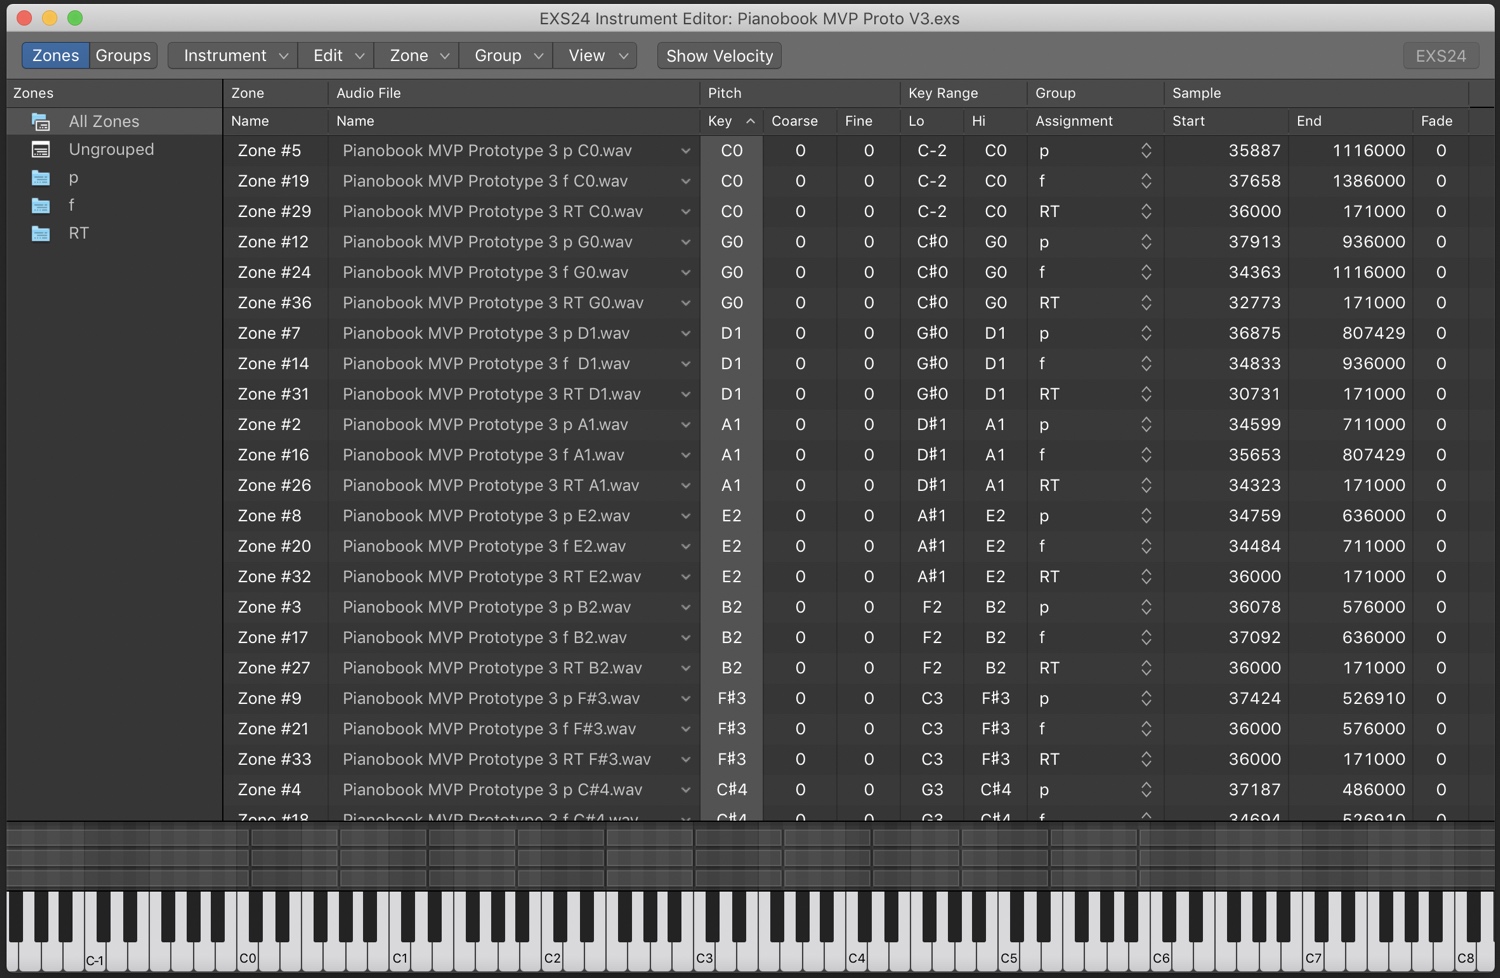
With all you sample files nicely named, in a blank ESX24 instrument click the “Edit” option to bring up the sample editor. Select Zone -> Load Multiple Samples and then select your recorded samples. Use the “auto-map” function to detect the sample note from the file name. You will need to create three zones for the different samples – the easiest way to do this is just select one layer of files (“p”, “f” or “RT”) at a time when loading.
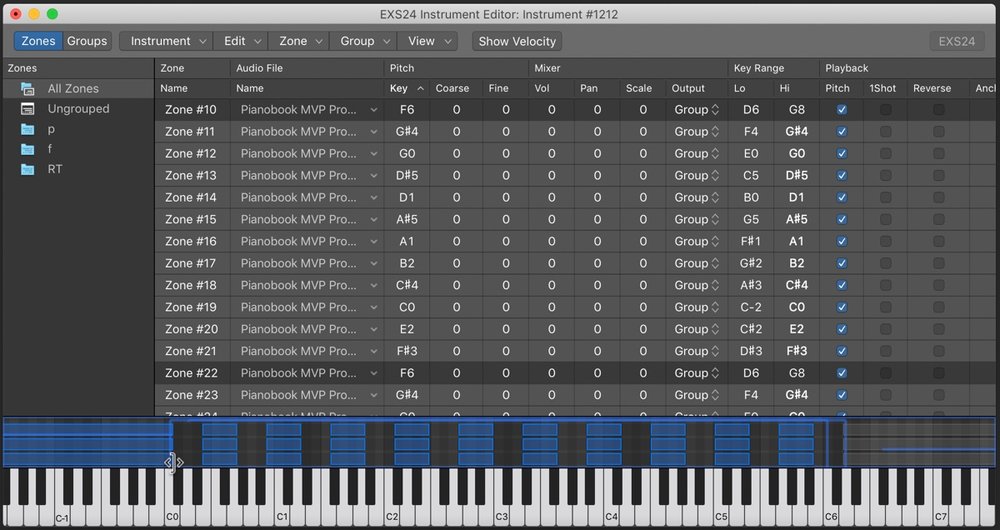
When ESX24 auto-maps the samples it will pitch shift each sample half way up to the next note and half way down to the previous. Pitching up samples tends to sound unpleasant and so we want to adjust the ranges so that the sample is only used for the note it was recorded at and then down to the next sample. To do this, select all the samples in all zones except for the very top note and, in the keyboard section, drag the top of the note range down to the sampled note. Then deselect the bottom note samples, select the top note samples and drag the start of each range to fill the gap.
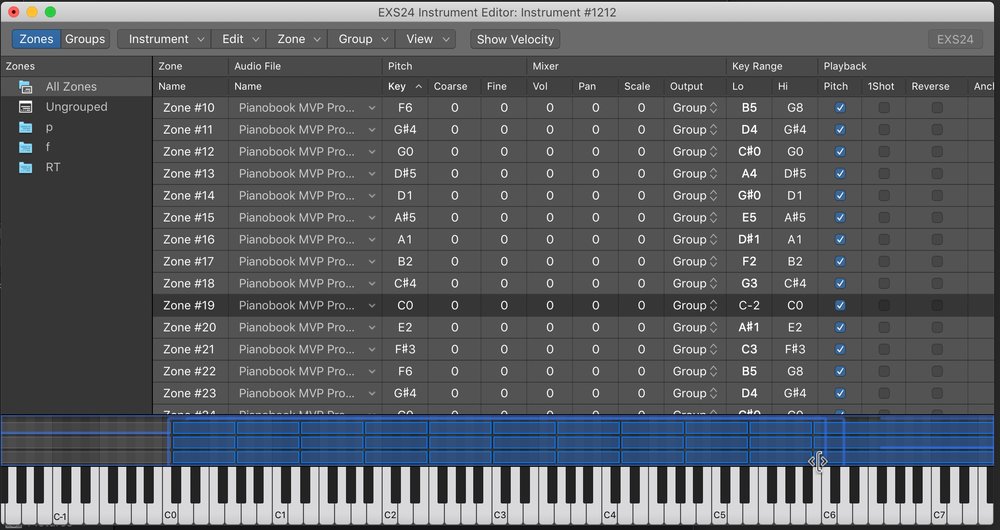
When you have adjusted the ranges you should have something that looks a bit like this.
Notice how each note has three versions, one in each of the groups “p”, “f” and “RT”.
To make sure the right samples play at the right volumes, switch to the “Groups” section and set up your groups similar to the following.
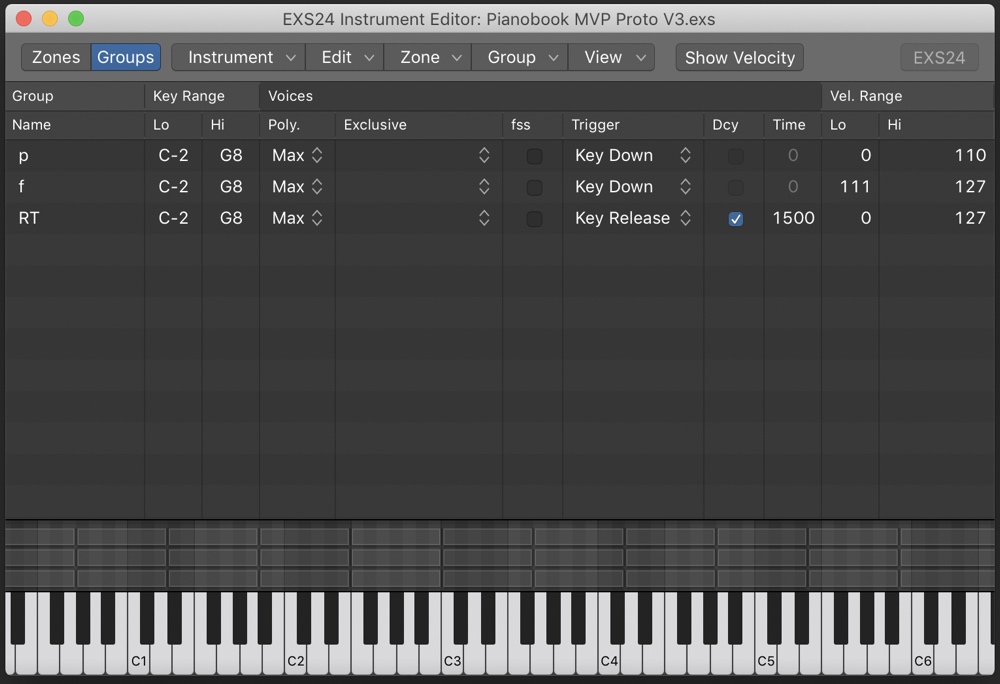
Notice how the “p” group plays in the velocity range 0 to 110, the “f” group plays in the range 111 to 127 and the RT group has a Trigger of “Key Release” and ensure you set a decay time (1500 is used in the example above). You may need to adjust the velocity range to suit your samples.
To tweak the instrument you will probably need to go and adjust the start times of each sample so that they align correctly. A full walkthrough of this process is in this video: